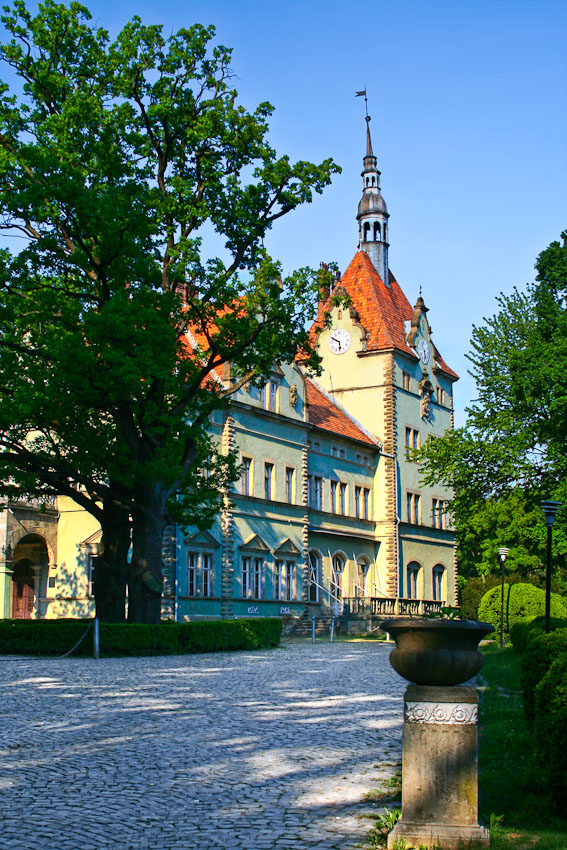
During the early 18th century, the beginning of the revolt led by Ferenc II Rákóczi took place around the Mukachevo area. During the mid-late 18th century, the city came under Austrian control as part of the Kingdom of Hungary and was made a key fortress of the Habsburg Monarchy. In 1726, the Palanok Castle and the town, before 1711 owned by the Rákóczi family, was given by the Habsburgs to the Schönborn family, who were responsible for an expansion of the town.
Mukachevo
How this was done.
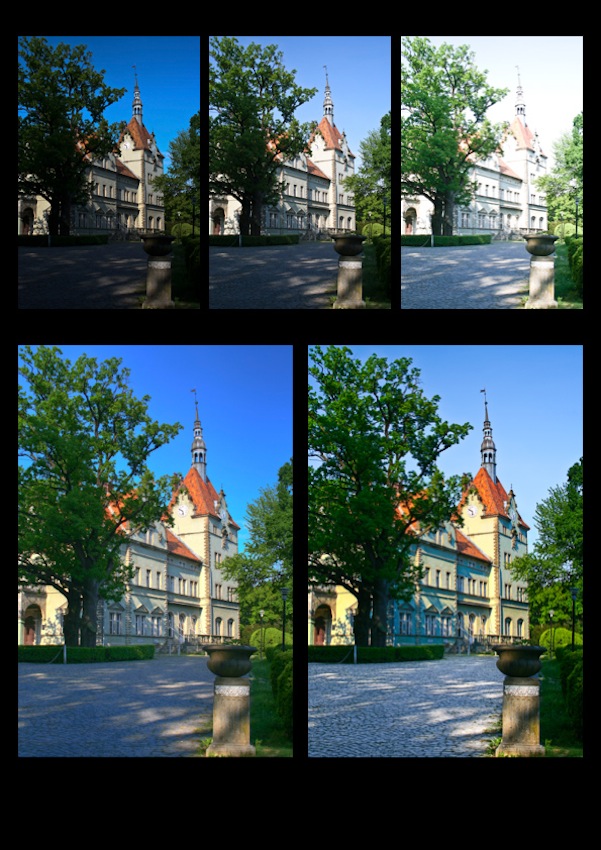
Once again, I started with only one original photo. You've got to work with what you have, and all that! From this original photo, I created two alternate versions, one underexposed by two stops, and one overexposed by two stops. Then I ran these three versions of this photo through Photomatix 4 to see what would come out.
On the bottom left, you see the output from Photomatix, and on the bottom right, you see the result after some adjustments in Photoshop. WAIT, you might be saying, the one on the left is the more colorful and vibrant of the two. That must be the final version! But there are a couple of problems with it.
When doing HDR, I generally try to keep the final results on the more realistic side. (Except when I try not to)! So, what's the problem with the results on the bottom left? Well, the sky is just too vibrant, plus, in the upper right of that photo, there is a banding problem. Why this happens in Photomatix sometimes and not in most occasions, I couldn't tell you. But after trying a number of adjustments, it was still there.
So I took the Photomatix output and the three original input versions into Photoshop. The main adjustment I wanted was to pull the sky out of the original photo (middle top) and overlay that onto the HDR result. Honestly, I think that sky is just more pleasing. I also lightened the brick in the foreground using the brick in the upper right photo.
Additional adjustments were using Topaz Detail (Bold Detail setting), with minor saturation tweaks in Topaz Detail, then, back in Photoshop, using the Fade command to fade the Topaz results by 50%. I then selected only the brick sidewalk and went back into Topaz Adjust and used the Bold Detail setting again, and back in Photoshop, used the Fade command again. I also upped the saturation on the yellow on the building.
8 comments:
Post a Comment